
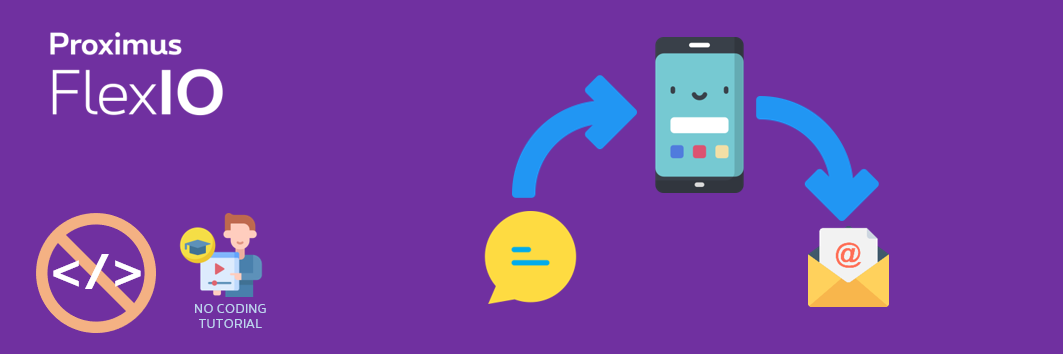
Check out how the turnkey FlexIO Voicemail solution improves the user & caller experience, and brings value to a ‘legacy telco feature’, or build your own voicemail application, with the Visual Designer of Proximus FlexIO there is no need to be an engineer or a developer to create your own new voicemail. A system that will mail you the messages and allow to retrieve the recordings with a simple mail or SMS link.
All you need to get started is subscription to Proximus FlexIO. Here is how it works.
Content of the article
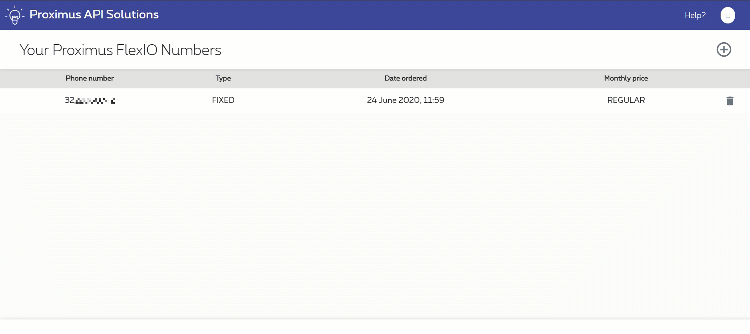
Book a new number
Once logged on API Solutions, open a new browser tab to the Proximus FlexIO Number Management microsite and register a new phone number to your account.
Create a new FlexIO Visual Designer application
Creating the blank application
Go to the “Applications” section of the Proximus FlexIO console, and click on the “+ Add New App” button, then “Create a Visual Designer Application”. Select the “Blank” template in the Template Gallery.
Give your application a new name and make sure the type “voice” is selected before clicking on “Create”.

The Visual Designer window opens in a new tab. We can see several components in this window:
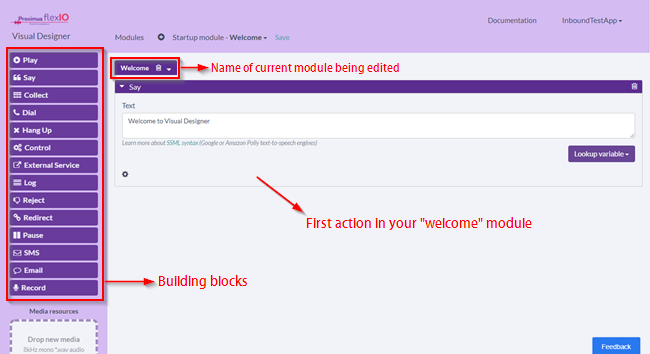
- Building blocks on the left: these are all action types that you can execute in your scenario, like “Play” for playing an audio file, “Say” to use text to speech, “Collect” to gather input from the caller, etc
- These action blocks can be dragged in the main screen, one below the other. They can be reordered on the screen and will be executed in sequence.
- Modules can be created and are ways to regroup action blocks together. There is always a startup module that will execute first. When creating a new application, the default module is called “Welcome”. Modules can be linked together using specific actions in some building blocks.
Configuring the welcome module
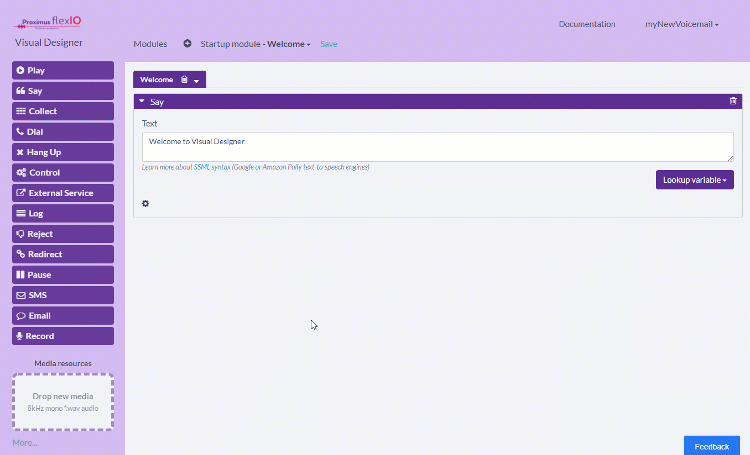
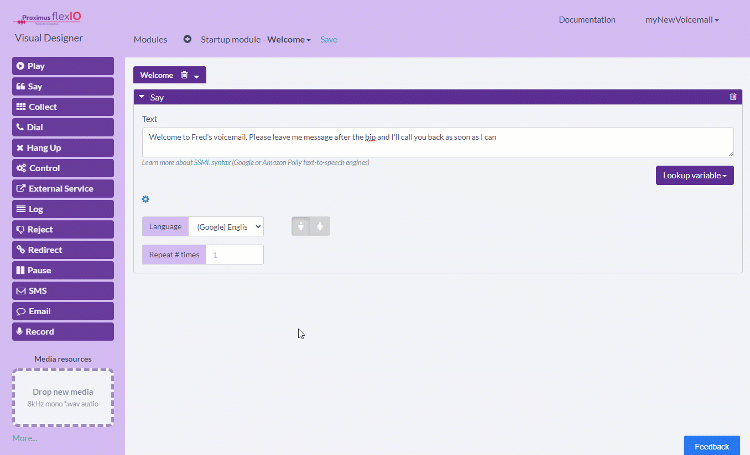
When people will call your new voicemail you will want to greet them with a welcome message. You can use the “Say” action, which is already added by default to your Welcome module, to use speech to text. Alternatively you could delete that “Say”action and drag instead a “Play” action, to play a prerecorded wav file. We’ll go on with the speech to text option, but you prefer to use a wav file you need to make sure your file is correctly encoded, then add to the application by dragging the file in the “Media resources” box.
Configure the Say action with your own welcome message, and select your preferred text to speech engine and voice type (male/female) from the action’s settings:
Recording then branching
Now that have greeted our callers, we want to record their message then receive this message by email. Triggering the recording will be done in our “Welcome” module, and once this is done we’ll need another module to take up from there and do the sending. Let’s create a new module we will call “email”:


Finally, we go back to the email module, drag an “Email” action to it and fill in its fields. Our email content text will be:
You have new message from $core_From.
Here is the URL to access your message: $core_PublicRecordingUrl
Since you are sending a mail to yourself, mind that the from address should be the same as the to address. The domain of the From address must exist on the network.
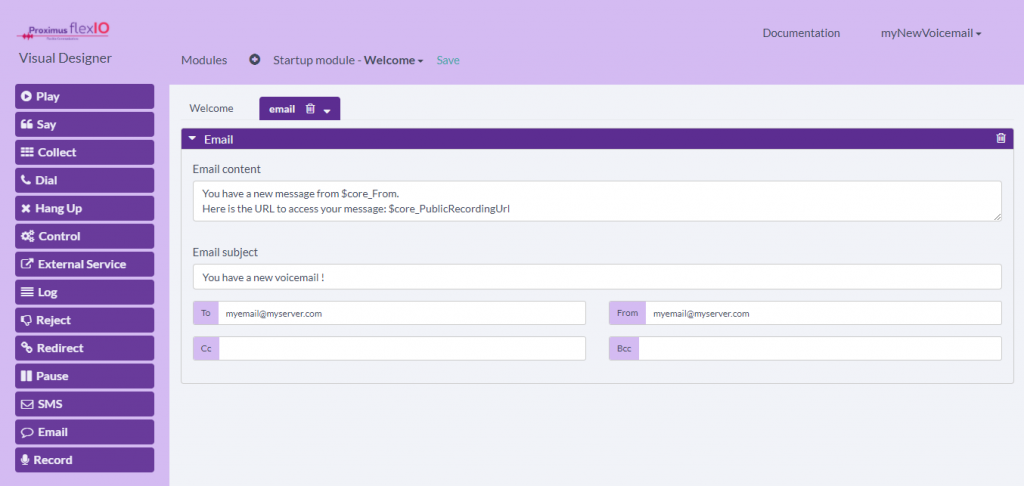
Note the use of 2 internal variables in the email content:
- $core_From: this will insert the phone number of the caller (if not a private or masked number)
- $core_PublicRecordingUrl: the URL to the audio recording. Public URL means you can access the recording without providing any authentication in your browser
You could use many other internal variables in the Visual Designer to support your scenarios. Refer to our online documentation for more examples.
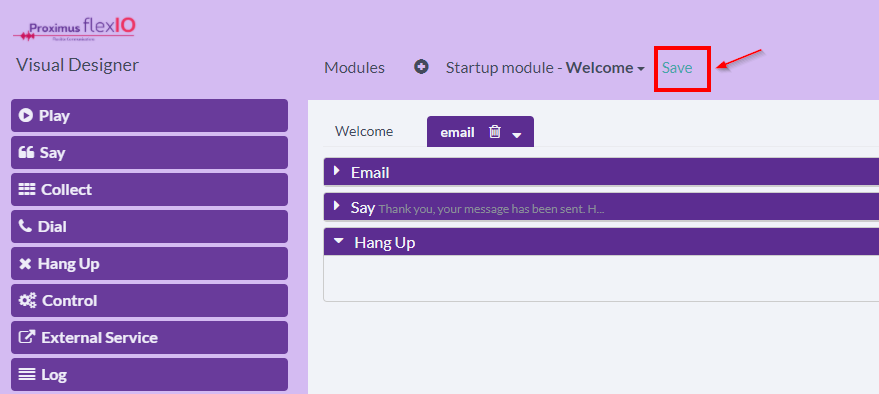
Finally, let’s confirm to the caller that the message has been sent, then hangup the call. Simply add and configure a new Say action that you add under the Email action, and finally drag a Hangup action at the end. Make sure you save your application:
Link your FlexIO phone number to the application
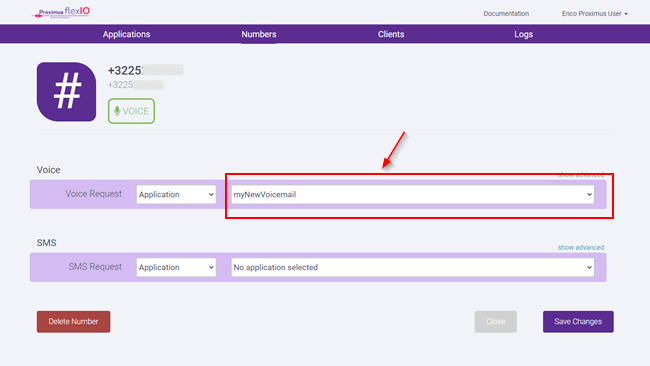
The final step is to tell Proximus FlexIO that it needs to trigger this new application once the platform receives a call for your number. To do so, go back to the FlexIO Console and select the “Numbers” section. Find your newly reserved number and click on it. From the drop down list next to “Voice request”, select your application then click on “save changes”:
Give it a try ! Now is a good time to call your number to test that everything is working well.
Configure Your Phone
For the final step, you will want your mobile phone to redirect unanswered calls to your new voicemail number. This operation may be different depending on your phone OS. On an Android smartphone, you would search in your dialer’s settings for the call “Transfer” settings:
- if busy : put your FlexIO phone number instead of “+32475151525” (for a Proximus customer)
- if no answer: put your FlexIO phone number instead of “+32475151516” (for a Proximus customer)
- if not reachable: put your FlexIO phone number instead of “+32475151525” (for a Proximus customer)
Depending on your mobile operator such options can also be configured used special dial codes.