
In this tutorial we will learn the very basic steps required to build an application using the Visual Designer that will answer inbound phone calls. If you are getting started with Proximus FlexIO, this is the right place to start.
Content of this article
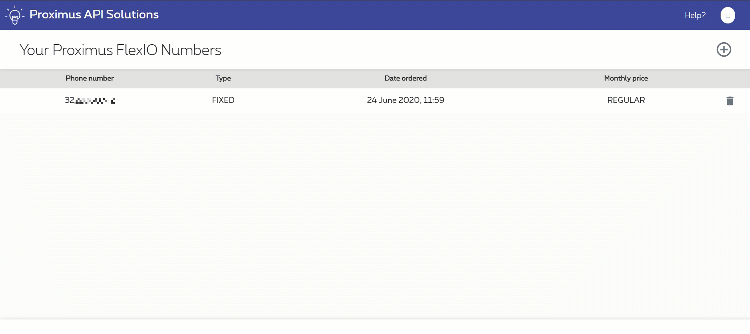
Getting a phone number
To implement this first application you will to have a valid subscription to the Proximus FlexIO service. Once this is done, you will need to have a least one available reserved phone number on the platform. To do so, log on Proximus API Solutions, then open a new browser tab to the Proximus FlexIO Number Management microsite and register a new phone number to your account:
Creating the Visual Designer application
Starting with a blank template
Now that we have a phone number, we need to create an application using the Visual Designer. This application will define the scenario that will be executed when someone calls your number.
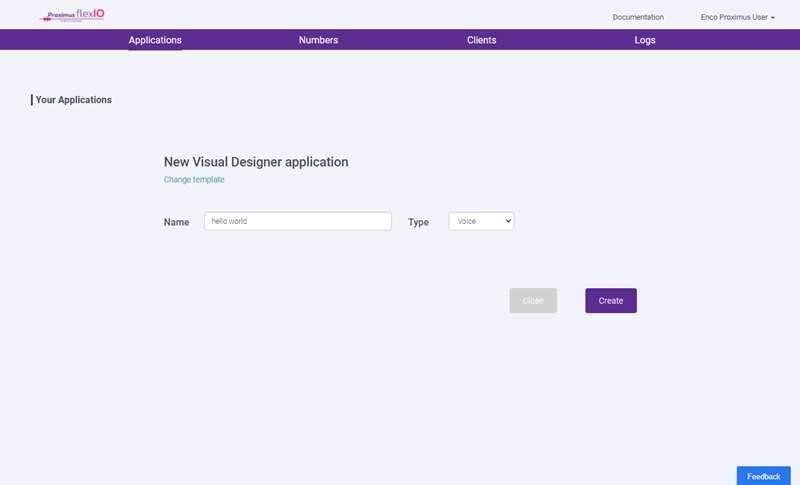
Log into with Proximus FlexIO console with the user credentials you received after subscribing to the service. Go to the “Applications” section of the console, and click on the “+ Add New App” button, then “Create a Visual Designer Application”. Finally, select the “Blank” template in the Template Gallery.
Give your application a new name (like “hello world” or anything meaningful to you) and make sure the type “voice” is selected before clicking on “Create”.
Discovering the Visual Designer
The Visual Designer window opens in a new tab. We can see several components in this window:
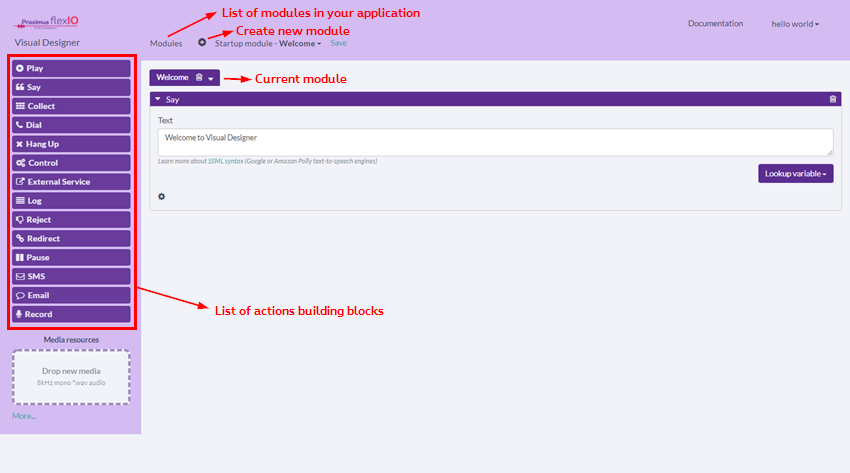
- Action building blocks on the left: these are all action types that you can execute in your scenario, like “Play” for playing an audio file, “Say” to use text to speech, “Collect” to gather input from the caller, etc
- Modules can be created and are ways to regroup action blocks together. More complex scenarios or applications typically use several modules where each module is composed of several actions. There is always a startup module that will execute first when the application is triggered. When creating a new application, the default startup module is called “Welcome”. Modules are linked together using specific actions in some building blocks.
- The action blocks can be dragged in the active module screen, one below the other. They can be reordered on the screen and will be executed in sequence.
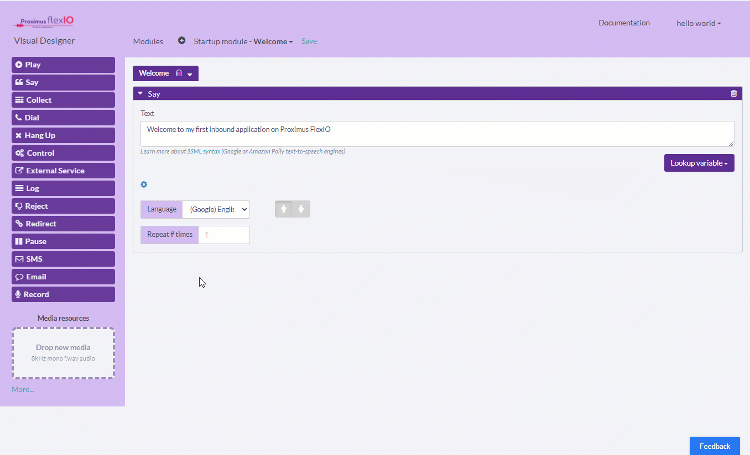
Configuring our welcome module
When people will call your new hello world application, you will want to greet them with a welcome message. You can use the “Say” action – which is already added by default to your Welcome module – to use speech to text.
Let’s enter “Welcome to my first inbound application on Proximus FlexIO” as text to be spoken out. Notice the little cogwheel icon at the bottom left of this “Say” action ? Clicking on it will allow to define additional parameters, specific to each action. In our case, we’ll select the “Google English British Wavenet B” voice and click on the man icon (man voice).

Notice all the possible voices and text to speech engines that can be used in your scenarios. With Proximus FlexIO, you are free to use any of the listed TTS engines and voices. Please note that TTS providers may not always provide both man and woman voices for all the different voices they propose.
Let’s assume that after our English spoken greeting, we want to greet the caller also in French. Simply add another “Say” action by dragging the action from the left menu under the first Say action. Notice the thick velvet bar that appears to show you where the dragged action will be inserted. Add the French greeting (“Bienvenue sur ma première application réalisée sur Proximus FlexIO”) and select the french voice of your liking after clicking on the cogwheel:
Save the application by clicking on the save link on the top of the screen. Once this is done, you can close the Visual Designer window.
Associating the phone number to the application
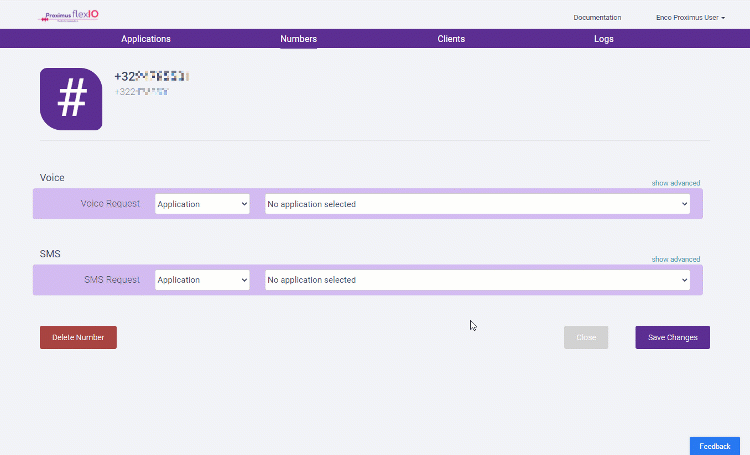
Now that you have both a phone number and an application, you need to associate these two together. This will let Proximus FlexIO know which application must be triggered when it receives a phone call to that number.
To do this association, go back to the FlexIO Console and select the “Numbers” section. Find your newly reserved number and click on it. From the drop down list next to “Voice request”, select your “hello world” application then click on “save changes”:
Testing it out
That’s it, your application is now ready to use! Pick up your phone and call your number.
Do you want to change anything ?
Should there be anything in your application you are not satisfied with, from the FlexIO Console just go back to the Applications section, click on the application you want to update then simply click on the Design button. The Visual Designer will open again, and any change you apply will become directly active after you press on save.